=======================================================================
1. PC 사이드 설정 시작
=========================== ======================== ===================
## 1. VS Code 설치 및 기본 세팅
데스크탑과 Ally 모두 윈도우 기반이므로 설치 방법은 동일합니다.
공식 사이트 접속: code.visualstudio.com에서 설치 파일을 다운로드하여 설치합니다.
한국어 설정 (선택): * 왼쪽 메뉴의 Extensions(정사각형 4개 아이콘) 클릭
Korean 검색 후 Korean Language Pack 설치 -> 재시작

그냥 확인 클릭. 이후 다음 다음 다음 다음 으로 설치 완료
Godot 지원 확장 설치:
Extensions에서 godot 검색 후 godot-tools 설치 (코딩할 때 자동 완성 기능을 도와줍니다.)

클릭하고 install 버튼 누르면
위에서 설치한 프로그램에 연결되어 페이지가 열린다.
거기서 다시 install 누르고 설치
## 2. Git 설치 (윈도우용)
VS Code가 내부적으로 Git을 사용하려면 윈도우 자체에 Git이 깔려 있어야 합니다.
git-scm.com에서 64-bit Git for Windows Setup을 받아 설치합니다.
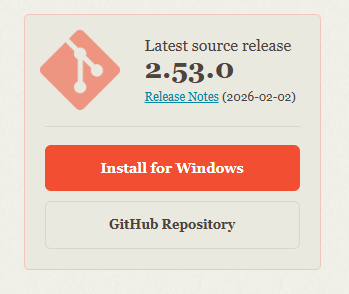
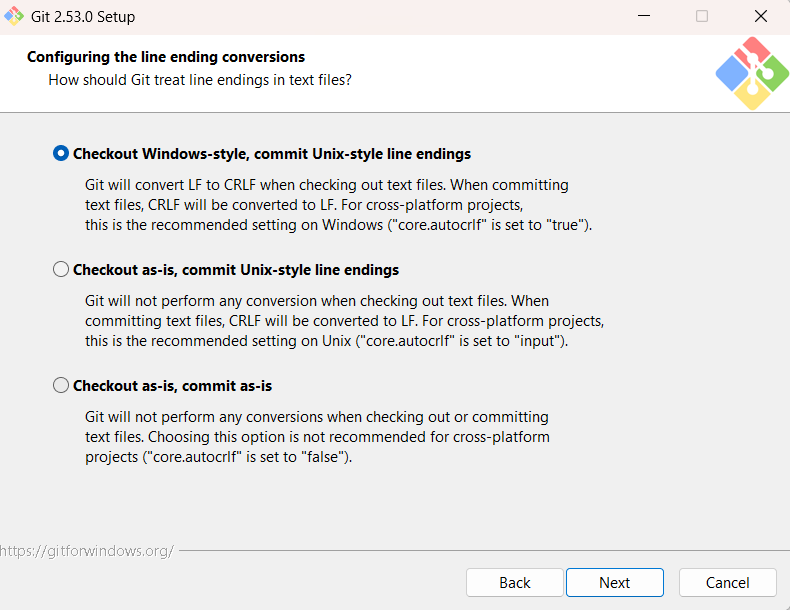
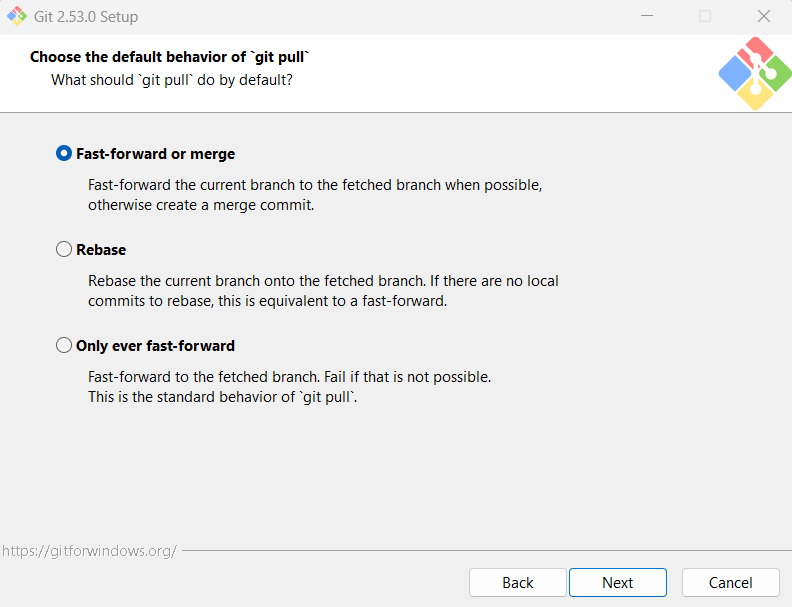
설치 과정 중 선택지는 기본값(Next)으로 계속 넘어가셔도 무방합니다.


난 install 버전을 설치했고 godot 으로 개발 할 것인지라
Use Visual Studio Code as Git's default editor
를 선택


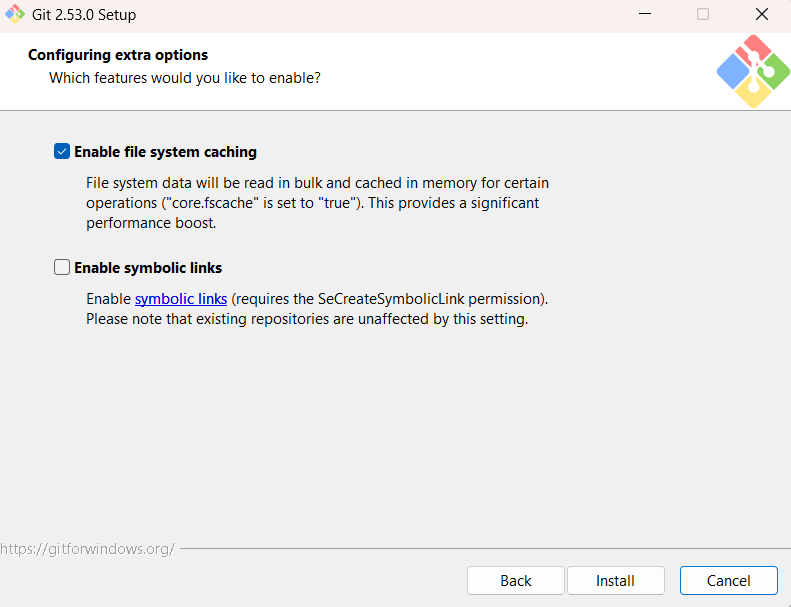
여기까지 설정했으면 이제 install 클릭.... 정말 긴 설정이었음.

모든 체크 해제하고 finish 클릭.
VS CODE 안에서 사용할 거라 실행 할 필요 없음.
## 3. 설치가 잘 되었는지 확인하기 (필수)
이제 VS Code를 열어서 모든 도구가 한 팀처럼 움직이는지 확인해 보세요.
VS Code를 실행합니다.
상단 메뉴 터미널 -> 새 터미널을 클릭합니다. (또는 단축키 Ctrl + `)
VS Code 터미널 창 우측 상단의 **+ 아이콘 옆의 아래 화살표(∨)**를 클릭합니다.
목록에서 **Git Bash**를 선택합니다.
새 창이 뜨면 거기서 다시 git --version을 입력해 보세요.
git version 2.53.0.windows.1 같은 메시지가 나오면 완벽하게 성공하신 겁니다!
git config --global user.name "원하는 이름"
git config --global user.email "메일주소"
위 두 명령어 등록
git config --list
위 명령어로 등록 상태 확인. 제일 하단에 이름과 메일주소 나오면 정상
VS Code 상단 메뉴: 파일(File) -> 폴더 열기(Open Folder)
방금 확인한 godot 프로젝터 폴드 선택 (또는 그 안의 실제 게임 폴더)를 선택하고 [폴더 선택] 클릭.
그 상태에서 다시 터미널(Ctrl + `)을 켜면 경로가 설정한 경로로 정확히 잡힐 겁니다.

yes, i trust the authors 클릭
vs code 터미널창에
git add .
입력 모든 프로젝트 연결
Initialized empty Git repository in 라고 나오면 정상
백업테스트
git commit -m "원하는 코멘트 예) game 프로젝트 v1.0"
[main (root-commit) 9sdadsf] 원하는 코멘트 예) game 프로젝트 v1.0
6 files changed, 78 insertions(+)
create mode 100644 game/.editorconfig
create mode 100644 game /.gitattributes
create mode 100644 game /.gitignore
create mode 100644 game /icon.svg
create mode 100644 game /icon.svg.import
create mode 100644 game /project.godot
정상 실행
git remote add origin ssh://ssh 아이디@주소/data/data/com.termux/files/home/storage/godot
정상 실행
git push -u origin main
설정에서 main 으로 만들었으니 main 임
error: src refspec master does not match any
main 아니면 위 에러 나옴
정상 입력시 아래와 같은 메시지 나옴.
git push -u origin main
Enumerating objects: 9, done.
Counting objects: 100% (9/9), done.
Delta compression using up to 16 threads
Compressing objects: 100% (6/6), done.
Writing objects: 100% (9/9), 1.93 KiB | 1.93 MiB/s, done.
Total 9 (delta 0), reused 0 (delta 0), pack-reused 0 (from 0)
To ssh:// 내가 설정한 ip /data/data/com.termux/files/home/storage/godot
* [new branch] main -> main
branch 'main' set up to track 'origin/main'.
=======================================================================
1. PC 사이드 설정 끝
=========================== ======================== ===================
=======================================================================
2. 리눅스 또는 안드로이드 TERMUX 사이드 설정 시작
=========================== ======================== ===================
먼지 git 허브용 폴더들 만듬
mkdir -p ~/storage/godot
만든 폴더로 이동하고
~/storage/godot $ git init --bare
hint: Using 'master' as the name for the initial branch. This default branch name
hint: will change to "main" in Git 3.0. To configure the initial branch name
hint: to use in all of your new repositories, which will suppress this warning,
hint: call:
hint:
hint: git config --global init.defaultBranch <name>
hint:
hint: Names commonly chosen instead of 'master' are 'main', 'trunk' and
hint: 'development'. The just-created branch can be renamed via this command:
hint:
hint: git branch -m <name>
hint:
hint: Disable this message with "git config set advice.defaultBranchName false"
Initialized empty Git repository in /data/data/com.termux/files/home/storage/godot/
~/storage/godot $
=======================================================================
2. 리눅스 또는 안드로이드 TERMUX 사이드 설정 끝
=========================== ======================== ===================
=======================================================================
3. 공유할 pc 설정 시작
=========================== ======================== ===================
공식 사이트 접속: code.visualstudio.com에서 설치 파일을 다운로드하여 설치합니다.
git-scm.com에서 64-bit Git for Windows Setup을 받아 설치합니다.
위 처음 설치 하는 방법과 동일
VS code 를 열고
git config --global user.name "원하는 이름"
git config --global user.email "메일주소"
실행해줘서 동일 이름 등록
VS Code 상단 메뉴: 파일(File) -> 폴더 열기(Open Folder)
Terminal 열고
ssh -p 포트번호 아이디@아이피 주소
서버에 한번 정상적으로 연결해주고
exit 로 바로 종료
처음 프로젝터 가져올때 clone 으로 가져와야 하는데 명령어 위치가 중요함
D:/games 폴더를 기본 폴더로 하고 싶다면 D:/ 에서 명령어 실행해야함.
D에서 아래와 같이 명령어를 내리면
git clone ssh://아이디@아이피주소/data/data/com.termux/files/home/storage/godot 프로젝트명
예) git clone ssh://root@192.168.0.1:8888/data/data/com.termux/files/home/storage/godot project
그리고 폴더는 D:/projett 폴더 안에 저장된 것들이 불러와짐
git pull origin main
다음 부턴 이렇게 다운 받으면 되고 수정후 업로드는
git add .
git commit -m "메시지"
git push origin main
하면 됨
=======================================================================
3. 공유할 pc 설정 끝
=========================== ======================== ===================
=======================================================================
4. 업로드 다운로드 단축키 만들기
=========================== ======================== ===================
터미널 혹은 파워셀에서
if (!(Test-Path $PROFILE)) { New-Item -Type File -Path $PROFILE -Force }; notepad $PROFILE
위 명령어로 노트실행. 아래 내용 붙이고 저장
function g {
param([string]$action, [string]$msg)
cd 프로젝터 폴더
if ($action -eq "down") {
git pull origin main
}
elseif ($action -eq "up") {
if (-not $msg) {
$msg = Read-Host "Enter Commit Message"
}
if ([string]::IsNullOrWhiteSpace($msg)) {
Write-Host "Cancelled: No message entered." -ForegroundColor Red
return
}
git add .
git commit -m "$msg"
git push origin main
}
else {
Write-Host "Usage: g down | g up 'message'" -ForegroundColor Yellow
}
}
저장
. $PROFILE
위 명령어로 프로파일 불러옴
g up 은 업로드
g down 은 다운로드임
*****************실행은 꼭 프로젝트 폴더에서 실행할 것!!!!!!!!!!!
git config --global user.email
git config --global user.name
위 두개의 설정 모든 개발 pc 설정 같아야함
문서 폴더 위치를 임으로 바꿔서 사용중이라면 아래와 같이 수정해야한다
문서 폴더 안해 "WindowsPowerShell" 폴더를 만들고
Microsoft.PowerShell_profile.ps1 파일을 만들고 위 명령어를 넣는다.
'IT 전자기기' 카테고리의 다른 글
| 텔레그램 봇 만들기 (0) | 2026.03.07 |
|---|---|
| 삼바에 삼바 연결 (0) | 2026.03.04 |
| termux 에서 플레이스토어 앱 실행 am 과 monkey (0) | 2026.03.04 |
| SSH 서버 열었더니 무작위 봇들의 공격이 들어온다. ssh-keygen 키 사용해서 로그인 (0) | 2026.03.02 |
| 홍콩에서 시리 챗gpt 사용하기. (0) | 2026.02.26 |


댓글